Learn How To Photograph The Northern Lights
How To Photograph The Northern Lights
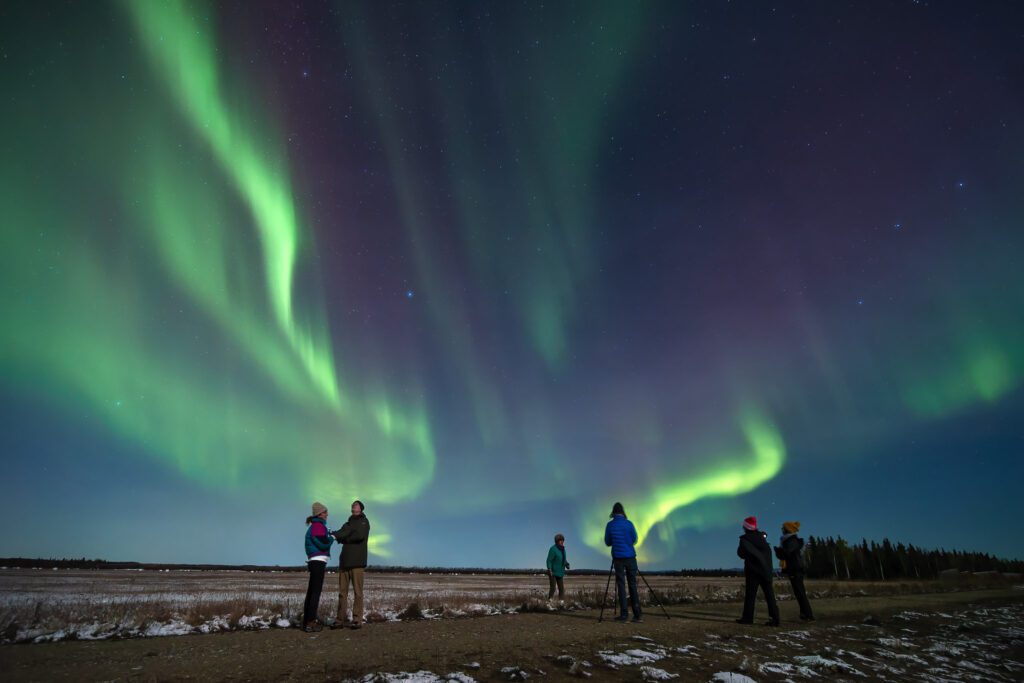
The Northern Lights, also known as the Aurora Borealis, present a stunning natural phenomenon that gracefully moves across the night sky. Capturing the Northern Lights on camera can be a daunting task, but with a little preparation and some patience, it is an exciting and rewarding experience. Taking a photograph of this ethereal beauty can be an exciting challenge. Here are some useful tips and things to consider to help you photograph the northern lights: Prepare Your Equipment, Select The Ideal Location, Timing is Essential, Camera Settings, Solar Activity, and Patience and Persistence are all the needed ingredients in having a successful experience. Join one of our photography workshops to get more in-depth and hands-on experience.
Prepare Your Equipment
Capturing the Mesmerizing Northern Lights: Essential Camera Gear
Photographing the captivating northern lights requires specialized camera equipment and preparation. To capture the details of the northern lights and the surrounding landscape, consider bringing a tripod that allows you to move the camera head in multiple directions for panoramic shots. Firstly, you’ll need a DSLR or Mirriorless camera with manual settings and a wide-angle lens 12-20mm. A lens with a wide aperture, such as f/2.8 or wider, will be useful to let in as much light as possible, especially since the aurora borealis is often visible at night. This will allow you to adjust the exposure, focus, and white balance to capture the dynamic and ever-changing aurora borealis.
You should also consider bringing additional lenses with different focal lengths to capture close-up details or distant views of the aurora borealis. Learn to work your camera in the dark and to manually set your focus on the brightest star or a far away light. Some folks will set their focus during the day on far away subjects and tape the lens so that it’s ready to go once they head out at night. Infinity focus isn’t always right on the infinity mark on your lens.
Before heading out, familiarize yourself with your camera’s settings and features. Experiment with different settings and bracket your shots to find the right balance between aperture, shutter speed, and ISO for the lighting conditions and your artistic vision. This will save you valuable time and effort during the shoot, ensuring you’re ready to capture the perfect moment. Additionally, scouting out locations during the day will help you find a good composition and avoid obstacles or hazards during the shoot.
A stable tripod is a must-have to keep your camera steady during the long exposures required for northern lights photography. If you plan to shoot for an extended period, being dressed appropriately for the weather conditions is crucial! A remote shutter release or cable release can also help minimize camera shake, further enhancing the quality of your images but if your camera has a 2 second delay that works just as well. If you want to add movement to your shots, try using an intervalometer to create a time-lapse video of the northern lights, newer cameras nowadays have this option built in camera.
Finally, don’t forget to pack extra batteries. The cold temperatures can quickly drain your camera’s power, so be sure to carry spares and keep them warm in your pocket to ensure you can continue shooting throughout the night. Finally, be patient and enjoy the experience. The northern lights can be unpredictable, so take the time to appreciate the beauty of the natural phenomenon while staying alert for opportunities to capture stunning shots.

Select The Ideal Location
Chasing the Northern Lights: Finding the Perfect Spot
The northern lights, also known as the aurora borealis, are a breathtaking natural phenomenon that draw photographers and nature enthusiasts from around the world. The northern lights are caused by charged particles from the sun colliding with Earth’s magnetic field and atmosphere. Capturing the vibrant, dancing lights on camera requires careful planning to ensure you’re in the right place at the right time. Putting as much big open unobstructed dark sky overhead away from the city light pollution looking towards the north sky is ideal, especially if the aurora starts to turn it up a notch or two.
If you’re chasing the northern lights, it’s important to check the weather forecast and the aurora forecast to increase your chances of seeing them. In this post, we’ll explore some of the top destinations for photographing the northern lights and share tips to help you make the most of your aurora-viewing experience.
Here are some top destinations for photographing the northern lights:
Tromsø, Norway
Situated well within the Arctic Circle, the Norwegian city of Tromsø is renowned as one of the best places to witness the northern lights. In addition to its natural beauty, Tromsø also boasts a thriving cultural scene and a variety of winter activities. With its minimal light pollution and prime location under the auroral oval, Tromsø offers ample opportunities to photograph the lights from September through April. To photograph the northern lights in Tromsø, head to Kvaløya Island or take a fjord cruise for a unique perspective.
Reykjavík, Iceland
Iceland’s capital city and the surrounding countryside provide excellent vantage points for aurora chasers.
To escape the city lights in Reykjavik, head to Thingvellir National Park or the Jökulsárlón glacier lagoon.
From the iconic Hallgrimskirkja church to the volcanic landscapes of the Snæfellsnes Peninsula, Iceland’s diverse scenery makes for stunning northern lights backdrops.
Fairbanks, Alaska
As one of the northernmost cities in the United States, Fairbanks enjoys prime visibility of the northern lights from August through April. Explore the region’s boreal forests, frozen lakes, and remote wilderness for unforgettable aurora photography. To stay warm during long photo sessions, dress in layers and consider investing in a good pair of insulated boots and gloves.
Whichever destination you choose, be sure to plan your trip during the peak northern lights season, pack the right gear, and be prepared to chase the lights across the night sky. And remember to bring extra camera batteries and a tripod to capture the perfect shot! With a little luck and persistence, you’re sure to capture the magic of the aurora borealis. Don’t forget to take a moment to simply enjoy the wonder of the northern lights as well.
While popular destinations like Norway and Iceland offer stunning backdrops, their proximity to large bodies of water can create unfavorable viewing conditions. The interior of Alaska, on the other hand, presents a prime location for aurora enthusiasts. Situated far from the ocean, the air in Alaska’s interior is drier, resulting in clearer skies that enhance the chances of spotting the elusive northern lights. Rather than relying on trendy locations, it’s crucial to prioritize finding a spot with the highest probability of success when the aurora is your primary objective.
Timing Is Essential
The Best Time to See the Northern Lights: In The North August-April
Chasing the elusive Northern Lights is a thrilling pursuit, but timing is everything. One factor to consider is the location – you’ll need to be far enough north to see the Northern Lights, with countries like Norway, Iceland, Sweden, and Alaska being popular destinations.
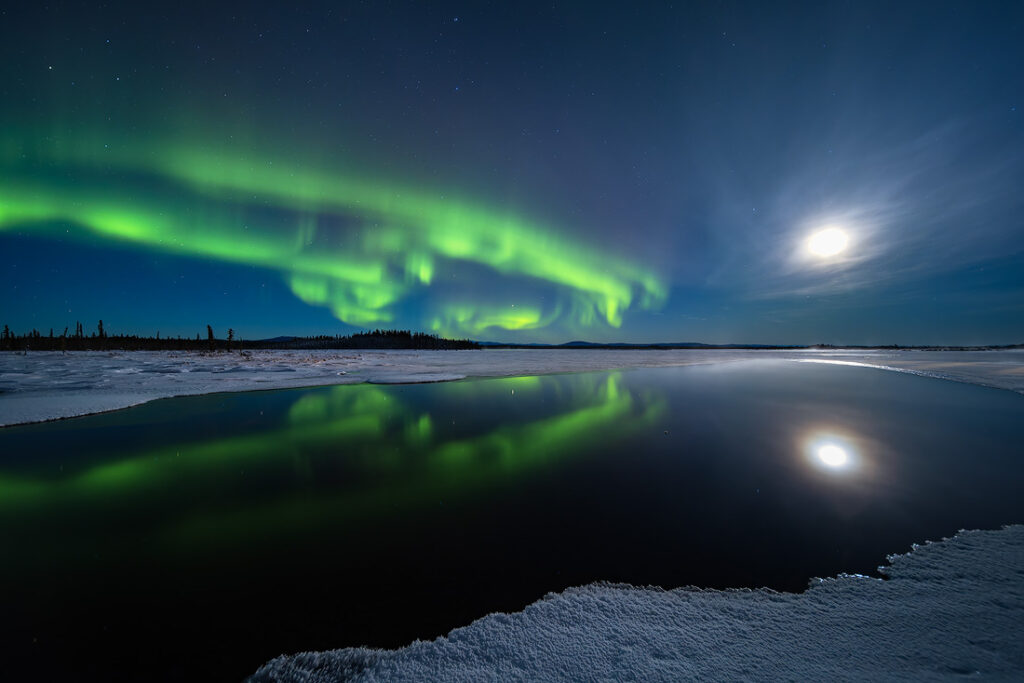
To witness this wondrous natural display, you’ll want to aim for crystal clear, moonless nights. With that said I enjoy shooting the aurora with a full moon. The moon has no effect on how the aurora reacts and a new moon isn’t necessary. Especially in the winter months, the moonlight will light up any foreground and surroundings giving you awesome shots. I also prefer clouds in my photographs to give the overall photo depth and contrast. Despite popular belief you can see the aurora under the moon and clouds depending on how thick they are. Staying awake is another essential part of seeing the aurora.
Depending on the solar activity the most activity with the aurora can take place between 12am-3am. The Northern Lights occur when electrically charged particles from the sun collide with particles in the Earth’s atmosphere, and the magnetic field near the poles helps to channel these particles towards the Earth’s surface.
The Northern Lights, also known as the Aurora Borealis, are most visible during the fall and spring equinoxes.
If you’re planning a trip specifically to see the Northern Lights, it’s worth doing some research on the dates of the equinoxes and the current state of the Earth’s magnetic field. This is when the Earth’s magnetic field is most active, creating the colorful light show in the night sky. This will help you to maximize your chances of seeing the Northern Lights during your trip.
However, cloud cover can quickly hamper your visibility. In addition to cloud cover, light pollution can also make it difficult to see the Northern Lights clearly. Be sure to keep a close eye on the weather forecast and plan your aurora-viewing excursions accordingly. This is why it’s important to find a dark spot away from city lights, where you can fully appreciate the beauty of the aurora borealis. Cloudy skies will obscure the lights, so you’ll want to choose a night with a clear dark sky for the best chance of success. Another tip is to allow your eyes time to adjust to the darkness – it can take up to 20 minutes for your eyes to fully adapt to low light conditions.
With a little planning and a lot of patience, you can experience the magic of the Northern Lights in all their glory.
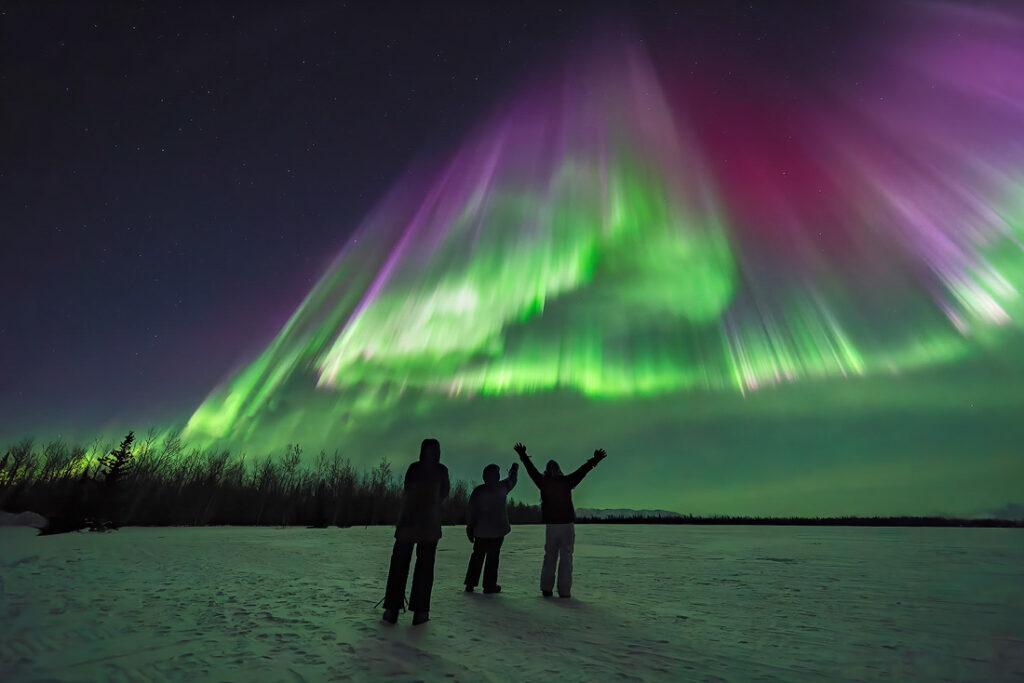
But trust me, the wait will be worth it when you’re treated to a stunning display of greens, blues, and purples dancing across the sky. Happy aurora hunting!
So pack your warmest winter gear, bring a thermos of hot cocoa, and get ready to witness one of the most awe-inspiring sights on the planet.

Camera Settings
Capturing the Mesmerizing Northern Lights: Mastering Your Camera Settings
Photographing the captivating northern lights requires the right camera settings to do justice to the vivid colors and dynamic movement of the aurora. One of the most crucial camera settings when photographing the northern lights is the white balance, so make sure to set it accordingly to avoid color distortions, but if you’re shooting in RAW then you can change the white balance later in post processing if you got it wrong in camera.
Start by setting a wide aperture, such as f/2.8 or lower, to allow in as much light as possible. Next, switch your camera to manual mode to have full control over your settings. Pair this with a long exposure time, between 10-30 seconds, to ensure you capture the full essence of the dancing lights. Depending on how the aurora is acting in the sky, your settings will constantly be changing. Remember we’re shooting light and that light gets bright and dim and it can happen very quickly, so we have to be ready to adjust our cameras for those moments.
To avoid overexposure, keep your ISO low, in the range of 400-1600. Remember, the northern lights are ever-changing, so don’t be afraid to experiment with your settings. However, if you notice that the northern lights appear too bright, try decreasing your ISO and adjusting your aperture and exposure time accordingly. If the lights appear dimmer, try increasing your ISO, exposure time, and aperture size to soak up as much of that ethereal glow as possible. With a bit of trial and error, you’ll be able to freeze the mesmerizing beauty of the aurora in your photographs.

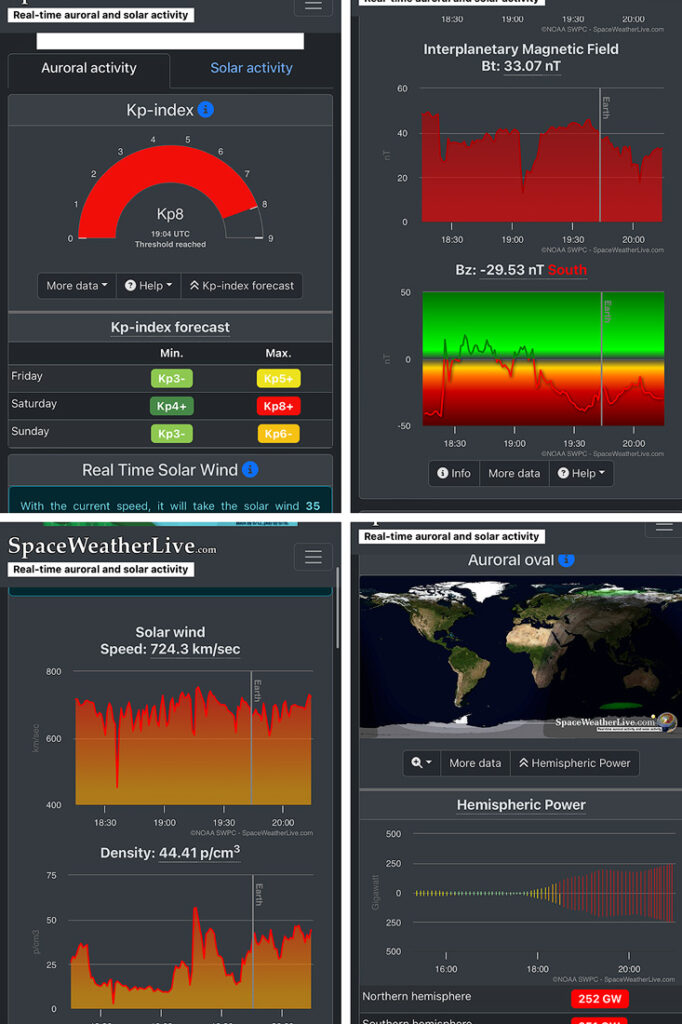
Data from the big solar storm of May 10th 2024.
The Space Weather
Understanding the Aurora: The Data
Witnessing the captivating display of the aurora borealis is a dream for many, but the ability to predict and plan for such an event is very difficult. The data behind the aurora’s workings holds the key to determining your chances of seeing this natural wonder, depending on your location.
Several factors must align for a grand aurora display to occur, as evidenced by the recent event on May 10th, 2024. The BZ, or the north-south component of the interplanetary magnetic field, plays a vital role. While a negative BZ is preferred, the aurora can still be visible under a positive BZ, provided you are situated far enough north.
Predicting the aurora’s behavior is a complex task, as the data is gathered in real-time from satellites in space and relayed to us on Earth. The speed at which the aurora travels determines the lag time before it reaches our planet, making it challenging to forecast its appearance far in advance.
While numerous apps claim to assist in this endeavor, their reliability has been questionable. Instead, I recommend using the free app SpaceWeatherLive, which provides up-to-the-minute updates on the aurora’s activity, giving you a play-by-play of its ever-changing dynamics.
Patience Is Essential
Chasing the Northern Lights: A Lesson in Patience and Persistence
Photographing the elusive Northern Lights requires a unique blend of skill, preparation, and unwavering determination. Even with meticulous planning, there may be times when the skies and the aurora refuse to cooperate, leaving you with little to capture. However, the true key to success lies in your ability to persevere.
The Northern Lights are inherently unpredictable, often requiring hours of dedicated photography to secure that perfect shot. But it is in these moments of frustration that your patience will be rewarded. With a little luck and a lot of persistence, you’ll come away with images that showcase the breathtaking beauty of one of nature’s most spectacular phenomenons.
Stay positive, keep your camera close at hand, and immerse yourself in the mesmerizing display. Remember, though, to occasionally step away from the viewfinder and simply bask in the awe-inspiring sight. One thing I always tell our guests is, every night is like Christmas when it comes to the northern lights, you never know what you’re gonna get! After all, witnessing the Northern Lights is a once-in-a-lifetime experience that transcends the mere act of photography.
